ARE YOU A MUSIC TEACHER? GET TEACHER ONLY PRICING HERE!

Fantastic Finger Guides Bow Training Kit — Installation & How to Use

Set up your Bow Training Kit and start building better bow control.

The Fantastic Finger Guides Bow Training Kit combines visual and tactile training tools designed to help beginning violinists develop bow-hand position, straight-bow movement, bow geography, bow length, speed, and control.

Meet Your Bow Training Kit

Before beginning the individual exercises, watch this introduction from Mr. Weston, creator of Fantastic Finger Guides, to understand the purpose of the Bow Training Kit and how the tools work together.

Alt image

Unbox Your Bow Training Kit

Alt image

Start by opening your Fantastic Finger Guides Bow Training Kit and checking that all components are included before beginning installation.

Inside the kit, you’ll find:

  • 1 Bow Hand Guide
  • 1 Bow Saddle
  • 2 Adjustable Bow Bats
  • Bow Geography Stickers
  • Blank Customizable Stickers
  • Straws
  • Instructions

You can use one tool at a time or combine them as needed. Practice regularly until a straight, confident bow stroke begins to feel natural.

For each tool below, start with the installation video and numbered visual steps. Then continue to the How to Use video and practice instructions.

Jump to a tool

1. Straws — Two Little Straws, Two Big Jobs

Set Up the Straws

Alt image

The straws provide an additional practice aid for developing bow-hand awareness and straight-bow movement. They can be used with the Bow Hand Guide for hand-position practice and on the violin as a visual/tactile reference while bowing.

1. Form your bow hand. Hold one straw like a bow stick. Practice bending the thumb and forming a relaxed bow-hand shape around the straw. You can also place the straw into the Bow Hand Guide and practice positioning the fingers and thumb before adding the full bow.

2. Prepare the straw guides. After removing the Bow Saddle, gently crease each straw lengthwise at one end so it can fit easily in the upper F-holes between the bridge and the fingerboard.

3. Position both guides. Place the prepared ends gently in the upper F-holes as shown in the setup video and illustration.

Practice: How to Use the Straws

Alt image

1. Practice your bow-hand shape. Treat the straw like a simplified bow stick: wrap the fingers, bend the thumb, and curl the pinkie. Combine the straw with the Bow Hand Guide to practice the same hand position without needing to hold the full bow.

2. Practice straight bows on the strings. With the two straw guides positioned as demonstrated in the setup video, lightly touch both straws at the same time as you bow.

2. Bow Geography Stickers

Install: Bow Geography Stickers

Alt image

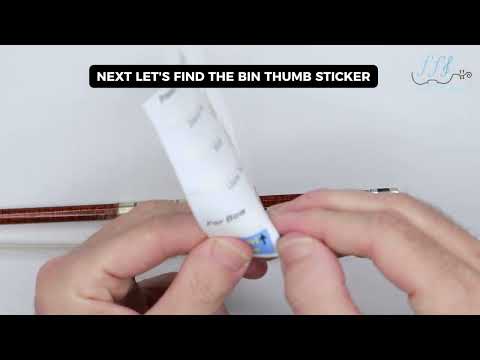
The Bow Geography Stickers help you learn where to play on the bow and track the area of the bow you are using.

1. Prepare the bow. Clean the bow stick, tighten the bow to playing tension, and place the bow flat on a table with the hair facing you.

2. Mark the middle and upper third. Place the M sticker at the middle of the bow. Place the U3 sticker halfway between the M sticker and the bow tip.

3. Find the balance point. Pick up the bow and balance it on two fingers between the M sticker and the frog. Place the BP sticker at the point where the bow balances on your fingers.

3. Bow Bats

Install: Bow Bats

Alt image

Bow Bats help you manage bow speed, bow length, and the section of bow you are using.

1. Feed the loop through. Feed the Bow Bat’s circular opening between the bow stick and bow hair, below the M sticker.

2. Fold and thread. Fold the wings inward. Pull the Bow Bat’s head and wings through the circular opening.

3. Secure the loop. Tighten the Bow Bat until the side ridges hold it securely in place and it does not move.

4. Attach the second Bow Bat. Repeat the same steps to attach the second Bow Bat over the U3 sticker.

5. Reposition when needed. Loosen the loop to disengage the tension ridges, slide the Bow Bat to the desired position, then tighten the loop again to re-engage the ridges.

Handle gently. The bonus card includes a spare Bow Bat. Avoid pulling on heads or wings.

Practice: Bow Geography Stickers & Bow Bats

Alt image

The Bow Geography Stickers and Bow Bats work together to help students understand where they are using the bow and how much of the bow they are using.

1. Find your bow area. Start with the stickers to identify different areas of the bow and recognize up-bow and down-bow direction.

2. Set your boundaries. Position the Bow Bats to create boundaries for your bow stroke.

3. Adjust the bow length. Move the Bow Bats closer together when practicing smaller bow motions. Move them farther apart as you begin practicing longer bow strokes.

Use the tools to work on:

  • Bow geography
  • Short and long bow strokes
  • Bow speed and bow length
  • Up-bow and down-bow direction
  • Straight-bow awareness

As control improves, reposition the Bow Bats and gradually expand the section of bow you use.

4. Bow Saddle

Install the Bow Saddle

Alt image

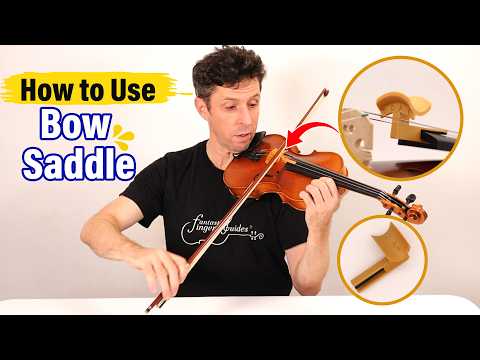
The Bow Saddle helps guide the bow in a straight path while practicing with a relaxed bow hand before adding sound.

1. Position the base. Place the lower base of the Bow Saddle carefully between the two middle strings of the violin.

2. Slide gently. Slide the Bow Saddle toward the fingerboard/scroll.

3. Check the fit. Continue sliding until it reaches a secure stopping point.

Practice: How to Use the Bow Saddle

Alt image

1. Explore a straight bow path. The Bow Saddle provides a physical reference for developing a straight bow path. Start slowly and let the bow follow the Saddle’s path. If the bow begins moving away from the intended path, adjust your arm movement and try again.

2. Learn direction and string levels. The Bow Saddle includes string-position markings and bow-direction symbols.

Down Bow: move the bow in the indicated direction.
Up Bow: reverse the movement in the opposite direction.

3. Explore different bow sections. Once the basic straight-bow motion feels comfortable, practice Middle to Upper Third or Balance Point to Upper Third.

4. Change strings. Practice changing strings while allowing the arm to adjust naturally to each string level.

5. Bow Hand Guide

Install the Bow Hand Guide

Alt image

The Bow Hand Guide helps position the fingers, thumb, and pinkie while encouraging a stable bow hold.

1. Position the bow. Place the bow flat on a table with the tip pointing left, the frog on the right, and the bow hair facing you.

2. Attach the guide. Position the Bow Hand Guide above the frog. Slide the Bow Hand Guide over the top of the frog until it stops.

3. Check alignment. Move it slightly left or right until the two alignment lines underneath line up with the ferrule, the shiny metal part of the frog.

Practice: How to Use the Bow Hand Guide

Alt image

The Bow Hand Guide provides visual and tactile reminders that help students organize the basic shape of the bow hand.

Begin with the three primary cues:

1. Wrap Fingers — allow the fingers to naturally wrap around the bow.

2. Bend Thumb — maintain a bent, flexible thumb rather than locking it straight.

3. Curl Pinkie — keep the pinkie curved and supported on the bow.

Place the fingers around the Bow Hand Guide and allow the guide’s shape and tactile areas to help maintain the hand position.

As you begin playing, keep the hand relaxed and allow the first finger to make natural contact with the bow stick while maintaining the curved thumb and pinkie.

The goal is not to force the hand into position. Use the guide as a reminder while your hand gradually becomes familiar with the shape through regular practice.

6. Bow Reminder Stickers

Alt image

1. Apply the Bow Reminder Stickers. Apply the Wrap Fingers, Bend Thumb, and Curl Pinkie stickers to the matching engraved areas on the Bow Hand Guide.

You’re Ready to Practice

Your Bow Training Kit is now ready to use. Start with one training tool or combine the tools as needed to practice:

Straws: Form your bow hand and practice straight bows with straw guides.

Bow Geography Stickers: Learn where you are playing on the bow.

Bow Bats: Control bow speed, length, and bow placement.

Bow Saddle: Practice a straight bow path.

Bow Hand Guide: Develop proper finger, thumb, and pinkie positioning.

Bow Reminder Stickers: Remember to wrap fingers, bend thumb, and curl pinkie.

Practice regularly until your bow hold and straight bow stroke begin to feel natural and confident.

Safety

Contains small parts. Not for children under 3 years. Recommended for ages 6+. Use only under adult, teacher, or caregiver supervision and follow the instructions when using with a bowed string instrument.

Questions? We’re here to help. support@fantasticfingerguides.com